Solar Panel Drone Inspection Workflow Guide
- Earth Mappers, LLC

- Apr 13
- 15 min read
The solar panel drone inspection market didn’t creep forward. It doubled from USD 516.49 million in 2018 to USD 1,019.88 million in 2024, and thermal imaging accounts for 80% of revenue according to Credence Research’s drone solar inspection market analysis. That tells you something important. Operators aren’t adopting drones because they look modern. They’re adopting them because panel-level faults are too expensive to find late.
On active construction and infrastructure sites, the lesson lands even faster. Earth Mappers is currently supporting Mortenson Construction on work tied to Met’s data center buildout in Eagle Mountain, Utah, and that kind of environment sharpens every inspection habit. Access routes shift. Trades stack on top of each other. Dust, glare, equipment traffic, and schedule pressure all compete with clean data collection. A solar panel drone inspection workflow has to survive real site conditions, not ideal ones.
Manual inspection still has a place for confirmation and repair verification. It’s not the right first pass across a large array or a complex site. Walking rows with handheld tools slows the team down, exposes technicians to more field risk, and makes coverage consistency hard to maintain. A drone crew can capture thermal and visual evidence in a repeatable pattern, geolocate anomalies, and hand field teams a map instead of a guess.
That changes how maintenance gets planned. It also changes who can act on the results. Construction managers need progress and risk visibility. Survey teams need coordinates they can trust. Asset managers need defect records they can compare over time. If you want a useful companion resource on the owner side, these solar power system maintenance tips help frame what happens after inspection data reaches operations.
This guide stays practical. It covers how to plan the mission, set the payload, fly for usable thermal data, check quality before leaving the site, process defects into decision-ready outputs, and explain the cost case in language stakeholders will sign off on.
Introduction to Solar Panel Drone Inspection
A good solar panel drone inspection starts long before takeoff. Most failures I see in the field don’t come from the aircraft. They come from bad assumptions made before the first battery goes in.
Why drone inspection changed the job
Solar arrays create a scale problem. Even a modest site can produce enough repetitive geometry to hide faults in plain sight. From the air, the inspection team can compare panels against neighboring panels, strings against strings, and thermal signatures across the site instead of reviewing isolated spots one at a time.
That matters because many issues don’t look dramatic on first glance. A hotspot, a cracked module, uneven soiling, or a string fault often appears as a pattern difference, not a visibly broken asset. Drone-based thermal capture is built for that comparison.
Practical rule: If the deliverable can’t guide a technician to the exact panel or exact section of the array, the inspection isn’t finished. It’s just imagery.
Where field reality changes the workflow
On a clean, stable utility site, your biggest challenge may be timing irradiance and controlling reflection. On a construction-heavy site like Eagle Mountain, the operational picture is wider. You have to account for haul routes, crane activity, changing laydown yards, active crews, and who owns each access decision on the day of flight.
That’s why experienced inspection pilots work more like survey leads than camera operators. They coordinate access, timing, site communication, and data handoff with the same discipline they bring to flight planning.
The rest of the workflow is where that discipline shows up. If pre-flight planning is loose, thermal results become hard to trust. If sensor setup is wrong, your post-processing team spends hours sorting out avoidable noise. If on-site QA gets skipped, you learn about the gap after mobilization instead of before demobilization.
Pre-Flight Planning Regulatory Compliance and Safety Considerations
Most solar inspection problems are preventable on the ground.

At the planning stage, the team needs to solve three things in order. Can we legally fly. Can we safely fly. Will the environmental window support useful thermal data.
Build the site brief before the flight plan
For Eagle Mountain-style work, I want one site brief that combines aviation, construction, and inspection constraints. Not three separate notes in three separate systems.
Include these items before you draw a route:
Airspace status: Confirm whether the site sits in controlled or uncontrolled airspace and whether any FAA Part 107 authorization or local coordination is required.
Access control: Identify who clears entry, who escorts if needed, and what zones are off-limits due to active construction or energized equipment.
Daily site conditions: Ask what changed since yesterday. New fencing, parked equipment, temporary structures, and fresh stockpiles can all affect launch and recovery.
Crew roles: Name the remote pilot in command, visual observer, and the person responsible for site communication. On larger sites, that third role saves the pilot from trying to manage radios and aircraft at once.
Emergency plan: Define lost-link actions, hard abort triggers, medical response route, and where the aircraft will be brought down if the mission has to be terminated.
A lot of teams over-focus on FAA paperwork and under-focus on contractor coordination. On active project sites, contractor coordination is what keeps the legal flight from becoming a bad field operation.
Weather and irradiance are not minor details
Thermal work only works when conditions support temperature contrast. According to Equinox’s guidance on AI-powered solar panel inspection, thermal inspections require 500 to 700 W/m² solar irradiance and viewing angles of 5 to 60 degrees, and adverse weather like dust storms or temperature inversions can degrade data quality by up to 30%.
That should drive the go or no-go decision more than convenience.
Use a handheld irradiance meter on site. Don’t rely only on forecast assumptions. Cloud movement over a large array can change the quality of one flight line to the next, especially in mountain-influenced weather around northern Utah. Dust can do the same thing. So can surface moisture, fresh snow nearby, or thermal crossover conditions early in the day.
If irradiance is unstable, pause and reassess. A delayed flight is cheaper than a full remobilization and a report nobody trusts.
A simple pre-flight environmental checklist helps:
Irradiance check: Confirm the thermal window before launch and re-check between sorties.
View angle review: Match camera angle to the array geometry so reflections don’t masquerade as anomalies.
Surface condition scan: Note dust plumes, standing water, snow, or haze that could distort interpretation.
Microclimate awareness: Mountain edges, open valleys, and broad gravel areas often produce localized conditions that don’t show up in the forecast.
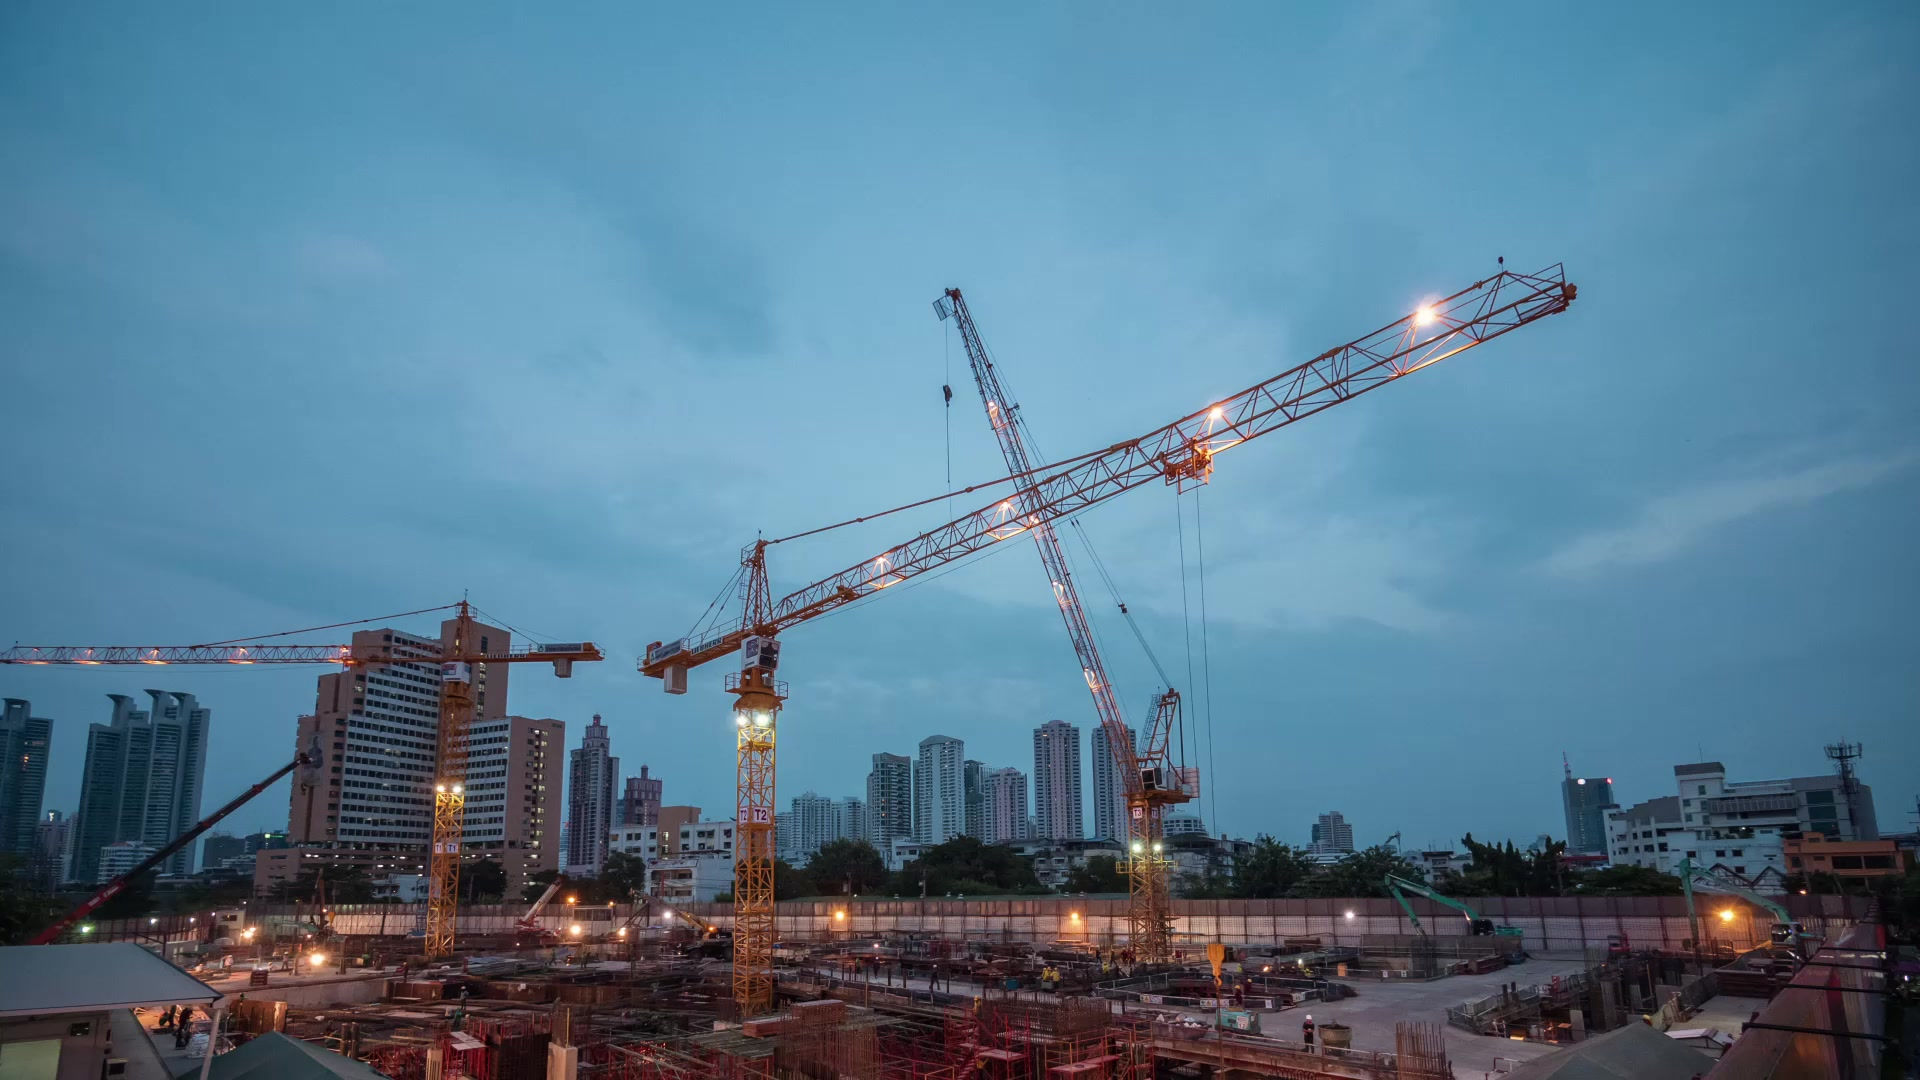
Here’s a useful visual overview of field setup and mission thinking before launch.
Safety protocols that hold up on mixed-use sites
Rooftop and utility-scale inspections don’t share the same safety profile. Rooftops create edge exposure, nearby occupants, and tighter launch options. Utility fields create longer traverses, energized equipment, repetitive visual backgrounds, and more chances to drift into active site operations.
Use a briefing format that field crews can act on quickly:
Launch and recovery zone: Mark it physically if the site is active. Don’t assume other trades will stay clear.
Abort language: Everyone on site should know the exact words for stop work around the aircraft.
Battery and heat management: Solar sites reflect heat back into the crew and equipment. Keep batteries staged in shade when possible.
Insurance and documentation: Have operational documents ready before the owner or GC asks. The time to hunt for them isn’t at the gate.
When the planning is done well, the flight feels uneventful. That’s the point.
Sensor Selection and Flight Parameter Setup
Payload choice decides what defects you can find and how defensible the report will be later. A cheap sensor can still produce a pretty map. That doesn’t mean it can support maintenance decisions.
Choose the sensor for the defect, not the drone for the brand
Solar panel drone inspection usually falls into three payload categories. Each solves a different problem.
Sensor Type | Resolution | Optimal GSD | Use Case | Advantages |
|---|---|---|---|---|
RGB | High-resolution visual imagery | Fine visual detail for visible surface review | Soiling, visible cracks, broken glass, layout verification, documentation | Clear contextual imagery, easier stakeholder review, useful for orthomosaics |
Radiometric thermal | Temperature-sensitive thermal capture | Tight enough to isolate thermal anomalies at panel level | Hotspots, underperforming modules, string-related thermal patterns | Detects subtle heat differences and supports defect prioritization |
Combined RGB and thermal | Synchronized visual and thermal dataset | Balanced for defect detection and visual verification | Most commercial and utility solar inspections | Faster interpretation because analysts can compare thermal anomalies against visual context |
In practice, a dual-sensor workflow saves time later. The analyst can compare heat signatures against visible conditions without trying to match separate site passes manually.
For geolocation, RTK matters because defect mapping is only useful when crews can find the exact panel quickly. If you need a refresher on why that matters in field measurement, Earth Mappers’ write-up on RTK in surveying is a good reference for the positioning side of the workflow.
Match GSD to the site objective
If the job is warranty-sensitive, repair-targeted, or focused on detailed anomaly review, fly for tighter detail. If the site is broad and the client needs a screening pass first, widen coverage and accept that some issues may require targeted follow-up.
The common mistake is trying to make one mission do both.
A practical decision framework looks like this:
Detailed defect mapping: Use a tighter ground sample distance when the client needs to isolate specific failing modules or cell-level signatures.
Portfolio screening: Use broader coverage when the goal is triage, then schedule follow-up flights over flagged areas.
Construction-stage documentation: Prioritize contextual alignment between visible imagery, asset placement, and installed condition.
Operations-focused thermal review: Favor thermal clarity and consistent geometry over raw area coverage.
Flight parameters that work in the field
The setup that looks efficient on paper can fail quickly in wind or glare. For multirotor work, slower flight speeds generally produce cleaner thermal data because they reduce motion blur and help the aircraft hold line in variable air.
Camera orientation matters just as much. A true nadir view often works for general mapping, but panel tilt and reflective conditions can make a slight adjustment more useful. The key is consistency across the whole mission. Random angle changes create interpretation problems later.
Don’t optimize only for acres covered per battery. Optimize for data you won’t have to argue about in processing.
Other setup choices that consistently help:
Use one mission profile per array section: Different table orientations or terrain breaks deserve separate planning.
Avoid mixing too many altitudes in one deliverable: Analysts lose consistency when imagery scale shifts too much across the site.
Treat wind drift as a data problem, not just a piloting problem: If the aircraft can’t hold the line cleanly, the imagery won’t either.
The drone platform matters, but payload discipline and mission design matter more.
Executing Data Capture and On-site Quality Assurance
The fastest way to waste a field day is to assume the mission completed just because the aircraft landed.

Run the mission like a survey, not a sightseeing flight
For solar work, the route should be built around repeatability. Whether you’re using a drone OEM app or third-party mission software, the flight lines need to respect the array geometry instead of forcing the site into a generic grid.
I usually divide the field into logical sectors based on row orientation, access, terrain break, or construction interference. That makes battery swaps cleaner and quality review easier because each block can be checked before moving on.
For coverage, keep overlap deliberate:
Front overlap: 80%
Side overlap: 60%
Primary camera angle: Nadir for standard mapping passes
Secondary angle when needed: Controlled off-nadir views to reduce reflections or inspect specific conditions
Those overlap settings aren’t decoration. They protect the stitching process and reduce blind spots in repetitive panel fields.
Watch conditions between sorties
A thermal mission isn’t one environmental decision made at takeoff. It’s a series of smaller decisions as the site changes under you.
If clouds build, dust starts moving across the array, or the sun angle shifts enough to create reflection issues, stop and reassess. The more uniform the panels look, the more a subtle environmental change can mislead interpretation.
Use on-site checks between runs:
Re-check irradiance
Inspect a sample of thermal frames
Look for blur at row ends and turns
Confirm no segment of the array was skipped
Review reflections before committing the next battery
Experienced crews apply their expertise to save the job. Newer teams often trust the progress bar in the app more than the image set on the screen.
QA before demobilization
A good field QA process is blunt. Don’t ask whether the mission “looks okay.” Ask whether the deliverable can be processed without guessing.
The common failures are predictable:
Blurred frames: Usually caused by speed, wind, or poor gimbal stability.
Coverage gaps: Often hidden near array edges, obstacles, or battery transition points.
Shadow contamination: Late-day shadows can complicate visual interpretation and thermal consistency.
Glare and reflection artifacts: Easy to miss in the field if no one zooms in.
Metadata mismatch: If files from separate flights aren’t organized immediately, post-processing gets messy fast.
A five-minute thumbnail review on site can save a full day of remobilization later.
My preferred on-site handoff is simple. One person flies. One person checks incoming data. If the same person does both on a large site, QA gets rushed. On smaller projects, that may be manageable. On a broad commercial or utility array, it usually isn’t.
A reliable folder structure also matters before leaving the site. Organize by date, site, sector, sensor, and battery set while you’re still in the field. Once mixed datasets hit the office, confusion spreads quickly.
When the team leaves with verified coverage and organized data, processing becomes analytical work instead of cleanup.
Data Processing and AI-assisted Defect Detection
Processing is where a solar panel drone inspection either turns into a maintenance tool or stays an image archive.

Start with clean ingestion and georeferencing
The first job is boring and critical. Confirm file integrity, preserve original thermal data, and separate RGB from thermal imagery without breaking naming consistency.
For sites captured with RTK-enabled aircraft, geotags provide the backbone for defect mapping. That positional accuracy is what lets an O&M crew move from the report to the correct panel row without a scavenger hunt.
The processing stack usually follows this order:
Ingest raw files and preserve originals
Align imagery and verify geotags
Build orthomosaics or project views
Fuse thermal and RGB context where the software supports it
Run defect detection
Validate results against visual evidence and site notes
Export georeferenced outputs for reporting
For software selection, the choice depends on whether your team cares more about photogrammetric control, thermal review workflow, or report automation. This comparison of photogrammetry software options is useful if you’re deciding how to structure the core processing environment.
Use AI as a filter, not a substitute for judgment
When the workflow is set up correctly, AI helps teams move through large image sets faster and with more consistency. It’s especially useful for repetitive anomaly types and for ranking what deserves human review first.
According to The Drone Life NJ’s discussion of common solar inspection mistakes, post-flight analysis can use AI to detect 1 to 2°C temperature variations indicating hotspots, cracks, or string faults, and success rates exceed 95% for defect detection when protocols are followed.
That last phrase matters. When protocols are followed.
AI output is only as reliable as the capture quality and the validation process behind it. If the mission included glare, inconsistent angle, unstable irradiance, or weak geolocation, the model may confidently label junk.
Here’s the practical review order I trust:
First pass: Let the software flag anomalies.
Second pass: Compare each flagged area against RGB context.
Third pass: Review surrounding panels to decide whether the anomaly is isolated, patterned, or likely environmental.
Final pass: Cross-check with any field observations, maintenance history, or known site conditions.
Handle noise before it becomes a defect
Thermal and visual datasets both suffer when the capture is marginal. Haze, sensor noise, compression artifacts, and low-contrast conditions can all increase false positives.
That’s one reason image cleanup matters. Even if your team already knows the basics, this guide to noise reduction for photos is a useful refresher on how cleanup choices affect detail preservation. In inspection work, over-smoothing can erase the very edges and signatures you need to keep.
A few processing habits improve reliability:
Keep radiometric files intact: Don’t convert away useful temperature data too early.
Review histogram and contrast carefully: Aggressive visual enhancement can make weak anomalies look stronger than they are.
Flag uncertain detections explicitly: Analysts should be allowed to mark “needs field verification” instead of forcing a yes or no label.
Track model drift over time: If a site type, panel finish, or local environment keeps producing the same false positives, adjust the workflow.
The strongest defect map is the one your field technician can verify quickly, panel by panel, without arguing with the analyst.
Validate against ground truth
The mature workflow doesn’t stop at AI detection. It closes the loop.
If a panel is flagged as anomalous, the repair crew or field verifier should confirm what was found and feed that result back into the process. Over time, this improves how analysts interpret recurring signatures from that site and helps separate true defects from environmental lookalikes.
That’s where solar inspection gets better than generic computer vision. The value isn’t just identifying a hot area. The value is producing a georeferenced defect record that operations teams can trust enough to act on.
Deliverables Preparation and Stakeholder Reporting
An inspection report fails when it forces every audience to interpret the same output the same way.
Construction managers, engineers, asset owners, and maintenance crews don’t need the same document. They need the same truth packaged in different forms.
Build reports around decisions
For project managers, the useful question is usually operational. What needs attention, where is it, and does it affect schedule or risk.
For engineers and GIS teams, the question is spatial. Can this defect be tied to a precise location, asset grouping, or design record.
For executives, the question is financial and strategic. Are we looking at isolated issues, repeat patterns, or a maintenance priority that should move now.
That means the deliverable set should usually include:
Annotated orthomosaic: Good for broad visual context and panel-level callouts.
Hotspot heat map: Useful for quick scanning and anomaly clustering.
3D or spatial site context where needed: Helps when topography, staging, or access routes matter.
GIS-ready files: Practical for engineering and long-term asset records.
Concise PDF summary: Better for decision-makers who won’t open a mapping platform.
Keep naming and severity logic consistent
Teams lose credibility when a “critical hotspot” in one report becomes a “moderate anomaly” in the next report with no explanation.
Use fixed naming conventions across projects. Keep defect classes stable. If the team changes terminology, document the reason and apply it everywhere in that project dataset.
A workable reporting structure often includes:
Deliverable | Primary Audience | What it should answer |
|---|---|---|
Interactive web map or dashboard | Project managers and operations leads | Where are the issues and how do we mobilize quickly |
PDF executive summary | Owners, directors, senior stakeholders | What was found and what requires action now |
GIS shapefiles or georeferenced exports | Engineers, surveyors, asset database teams | How do these findings integrate with existing systems |
Panel-level annotated imagery | Field technicians and repair crews | Which exact asset needs inspection or repair |
Write findings in field language
Analysts often write for other analysts. That slows action.
Instead of saying the thermal pattern is “indicative of multi-factor underperformance requiring further assessment,” say what the field crew needs to know. Example: panel group shows a repeat thermal anomaly pattern and should be checked for module fault, shading source, or string-related issue.
That style matters on contractor-led projects. Mortenson-style project environments move fast, and reporting that requires interpretation tends to get parked. Reporting that supports immediate assignment tends to get used.
A strong deliverable package also keeps evidence linked. Every anomaly should trace back to an image, a map location, and a clear finding description. If a stakeholder asks how the team reached a conclusion, the answer should be one click away, not buried in analyst notes.
Conclusion and ROI Cost-benefit Guidance
The value of solar panel drone inspection becomes obvious when you compare it to what teams used to accept as normal. According to Birds Eye Aerial Drones’ solar farm inspection overview, one drone team can inspect 50 to 100 MW per day, while manual methods can take weeks. The same source notes that pricing often runs $150 to $500 per MW in the United States, and one 7.5 MW thermal inspection identified $21,423 in lost revenue tied to previously undetected anomalies.
That combination is why drone inspection earns budget approval. It compresses field time and surfaces recoverable value.
A simple way to model the cost case
You don’t need a complicated spreadsheet to make the first-pass ROI case. Start with four inputs:
Site size in MW
Inspection cost per MW
Estimated value of detected issues
Operational cost of waiting to find those issues later
From there, ask practical questions.
If the site can be inspected in a day instead of over weeks, what labor and scheduling friction disappears. If defects are found before they show up in production reporting, how much avoidable loss gets prevented. If the report gives repair crews exact locations, how much troubleshooting time gets cut.
The direct math is straightforward. The harder part is assigning a value to avoided uncertainty. That’s where many teams still struggle. As noted by 60Hertz Energy’s discussion of aerial solar inspection gaps, cost-benefit analysis and ROI modeling for solar inspections remains poorly documented, especially around total cost of ownership, training, and break-even points across different farm sizes.
That gap is real. In practice, I recommend a conservative model.
Use a conservative break-even template
Structure the estimate like this:
Inspection cost - Multiply site MW by expected inspection price per MW.
Immediate recovery opportunity - Estimate the value of faults likely to be identified and corrected quickly. - If you don’t have historical data, keep this assumption conservative.
Secondary savings - Reduced labor spent locating faults - Less repeat site mobilization - Faster warranty support when evidence is organized - Better maintenance prioritization
Break-even view - If avoided or recovered value exceeds inspection cost, the program has already justified itself on a single cycle. - If not, compare repeated manual effort and delayed fault discovery over the annual maintenance window.
What works and what doesn’t
What works is a repeatable program. Consistent flight conditions, clean geolocation, disciplined QA, and reporting built for action.
What doesn’t work is buying a thermal payload and assuming ROI appears automatically. A weak mission design can still produce pretty deliverables with poor maintenance value.
For teams building this capability internally, the smartest path is usually to standardize one workflow first. Pick a site type. Lock the mission profile. Standardize your defect classes. Then expand. If the team needs external support while building the process, drone inspection service providers can fill the gap or help validate the workflow against active project conditions.
The biggest operational shift is simple. Drone inspection turns solar maintenance from delayed discovery into targeted action. When the data is captured well and reported clearly, repair teams stop hunting and start fixing.
If you need aerial inspection, mapping, or georeferenced reporting support for active construction, infrastructure, or energy sites, Earth Mappers can help you evaluate the workflow, data needs, and deliverable format for your project.

Comments